Hey all!!
Valentine’s Day is around the corner!! Need a gift idea…. for next year?
Hear me out.
Last Valentine’s Day I came up with this sweet gift idea for my husband, Brandon. And it truly has been the gift that keeps on giving! Granted, it took a bit of work, but it was SO worth it!! You could do this for any special event though (anniversary, birthday, Christmas, etc.) or just a random “I love you” gift.
What is it, you ask? A daily calendar, each day including a reason why you love that person.

How do you come up with 365 reasons!? Seems a little daunting, right? Maybe a little, but here’s what I did to make it even more special.
Every day for a whole year, I paid attention to a reason that I love Brandon & wrote it down (or entered it into my diary app on my phone). I soon realized that this also acted as a diary of sorts & reviewing it a year later would be fun to reminisce on what we did that day the year before.
I came up with this after receiving a sweet Valentine’s Day gift from Brandon where he typed up 2 pages of reasons why he loves me. We usually don’t go that crazy for Valentine’s Day, so this was a very sweet surprise. It made me want to do something special for him the next year, so I started planning ASAP. At the time, I had just read “The Compound Effect” by Darren Hardy & he talked about how he had written down in a journal 1 reason every day why he loved his wife. He gave that journal to her as a gift the next year, & it was obviously very heartfelt & meaningful. I thought, I should do that, but instead of just giving him a journal, I could make a daily flip calendar where he got to look at a different reason, on display, every day for a whole year. My crafty mind went to work immediately & I started paying attention to & tracking my “love” reasons right away.
Steps for Part 1: 1 YEAR OF TRACKING
- Get a journal OR a “diary” app on your phone where you can type something in for each day. I used the diary function on an app called AwesomeNote, but I’m sure there are tons of others out there!

- Every day, pay attention to a reason why you love that person. Trust me, this is a true labor of love. It’s hard to remember to pay attention every single day to this, but after awhile, it becomes a habit (probably a good thing for your relationship, right?). Don’t worry if you forget a few days…just try to think back on what you did that day & come up with something. And if you can’t remember, that’s when I would just write some kind of physical feature or general reason (like great teeth, or kind-hearted, or something like that).
- Optional: Throughout the year, periodically type up your reasons in a word document (this will make your life easier when the time comes to make your calendar).
Steps for Part 2: MAKE THE CALENDAR
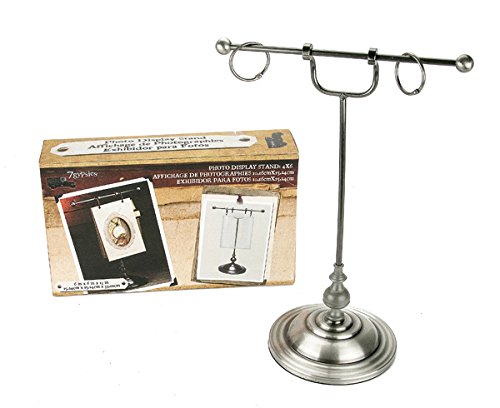
- Buy a flip photo stand. I bought this one from Amazon & it worked perfectly!
- Pick out your paper. This was my favorite part because I have an obsession with scrapbook paper. I used a combination of nice printed scrapbook paper/cardstock & plain construction paper to save on costs. I picked out different printed/colored paper for each month’s theme (January = white, blue, silver … February = red, white, pink … March = green, gold, black … etc.)
- Cut your paper to desired size (if you use a paper cutter it’s much easier!). I believe I cut mine to 6×6, that way I got 4 sheets from each 12×12 piece of scrapbook paper.
- Type up your 365 days of love. Make sure you use a template on Microsoft Word or Microsoft Publisher where you can cut out multiple days per sheet. Size doesn’t really matter, as long as it’s smaller than your piece of scrapbook paper you cut out. I think I printed mine on a 4.25 x 5.5 (4 sheets per 8.5 x 11 sheet). You can print these out on any type of paper you’d like … I kept mine cheap & simple & printed on plain ivory paper.
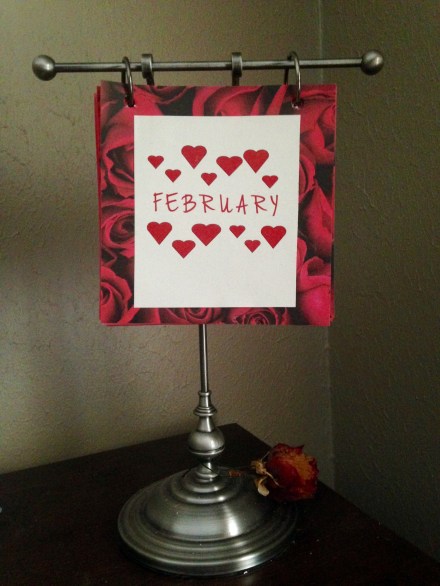
- Make a cover sheet for each month (use same size as your other days). I spiced mine up & included cute themed pictures on each.
- Fasten your cover sheets & 365 days of love to each larger piece of themed scrapbook paper (using glue stick, tape, or whatever other method your heart desires) & organize/keep in order! Here’s an example of mine:
- Using a hole punch, punch 2 holes in the top of each sheet (can do multiple at a time).
- Use a binder clip or paper clip to organize your 365 days by month. Here’s what all of mine looked like when completed (February is on the stand right now so that’s why it’s missing…ha)

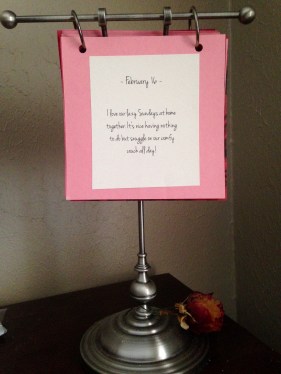
- Get out the current month to display on your stand & store the rest to bring out throughout the year! If you purchase the stand I did, you can remove the rings from the top, loop through the holes you punched on your calendar & fasten on the stand. Here’s what it looks like (TaDa!):
- DONE! Trust me, this is a hit … Brandon was shocked that I had done this for a whole year. It took effort but it was WORTH IT!
Lastly, MAKE THIS IDEA YOUR OWN!! This is simply me sharing something I did, but there are so many different ways you can customize this & make it your own. Don’t enjoy the crafty thing & don’t want to go through this much work? Maybe you could just buy an actual calendar for the next year & write down a different love reason on each day. You could do the journal idea & simply give your significant other a journal with your reasons. Heck, you could do 1 reason per week or 1 reason per month if you want instead of each day! The possibilities are endless, but I hope this at least inspired some creative thought & a new unique gift idea for the loved one in your life!
HAPPY VALENTINE’S DAY EVERYONE!
Love, Janeen 🙂


